Spider Stitch Blanket Crochet Pattern – Step-by-Step Tutorial
Welcome to Crochet Everyone! Today, I’m excited to share a beautiful and cozy project that’s perfect for relaxing evenings, thoughtful handmade gifts, or adding a touch of warmth to your home—the Spider Stitch Blanket.
This blanket combines simplicity and elegance, making it a wonderful project for crocheters of all skill levels. Although the spider stitch creates an intricate, textured appearance, it is surprisingly easy to learn and works up quickly once you get into the rhythm.
In this tutorial, I’ll walk you through each step of the process, from creating the foundation chain to adding the finishing border. By the end, you’ll have a soft, durable blanket featuring a gorgeous texture that is sure to become a favorite for years to come.
Spider Stitch Blanket Crochet
About the Spider Stitch
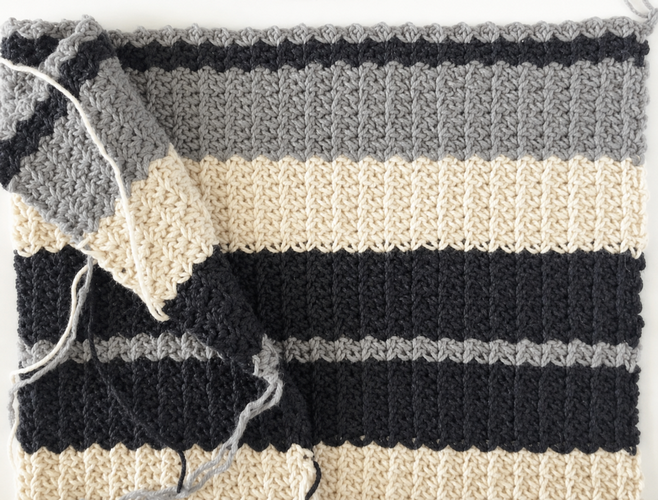
The spider stitch creates a delicate, web-like texture that gives this blanket both visual interest and a wonderfully soft feel. Each “spider” is formed by working a simple combination of single crochets and chains, creating a repeating pattern that is easy to memorize and enjoyable to crochet.
The result is a blanket with beautiful texture, excellent drape, and a timeless design that looks stunning in any color combination.
Spider Stitch Blanket Pattern
Stitch Guide
Single Crochet (SC):
Insert your hook into the stitch, yarn over, and pull up a loop. Yarn over again and pull through both loops on the hook.
Foundation Chain
Chain 75.
To customize the width of your blanket, use any odd number of chains.
Row 1
Work into the third chain from the hook:
- 1 SC, chain 1, 1 SC in the same stitch (this creates the Spider Stitch).
- Skip the next chain.
- Work another Spider Stitch (SC, CH 1, SC) into the following stitch.
Continue repeating this pattern across the row.
When you reach the end, you should have one chain remaining. Work 1 SC into the final chain.
Chain 2 and turn. The turning chain counts as your first single crochet.
Row 2
Skip the first two stitches and locate the chain-1 space from the previous row.
Work a Spider Stitch (SC, CH 1, SC) into that space.
Continue working a Spider Stitch into each chain-1 space across the row.
After the final Spider Stitch, work 1 SC into the top of the turning chain.
Chain 2 and turn.
Row 3 and Beyond
Repeat Row 2 until your blanket reaches the desired length.
Color Sequence
For this blanket, I used the following color pattern:
- 8 rows Birch
- 8 rows Onyx
- 2 rows Aquamarine
- 8 rows Onyx
- 8 rows Birch
- 8 rows Aquamarine
- 2 rows Onyx
- 8 rows Aquamarine
- 8 rows Birch
- 8 rows Onyx
- 2 rows Aquamarine
- 8 rows Onyx
- 8 rows Birch
Feel free to customize the colors to match your personal style, seasonal decor, or favorite color palette.
Finishing the Blanket
Border Instructions
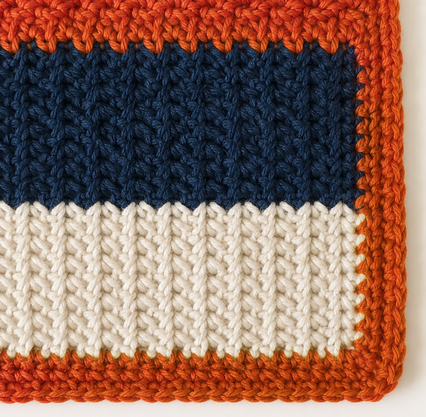
Once the blanket reaches your desired size, it’s time to add a neat and polished border.
- Weave in all loose ends using a tapestry needle.
- Join Aquamarine (or your preferred border color) in any stitch, avoiding the corners.
- Work 1 SC evenly around the entire blanket.
- Along the side edges, work approximately 1 SC in every other row to maintain a smooth edge.
- In each corner, work 3 SC to help the blanket lie flat.
- When you reach the starting point, join with a slip stitch, chain 1, and turn.
- Work additional rounds of single crochet as desired.
I completed four rounds of single crochet for my border, but you can add more or fewer rounds depending on the look you prefer.
After completing the border, weave in all remaining ends.
Your Spider Stitch Blanket is now finished and ready to enjoy!
Care Instructions
This blanket is machine washable. For best results and to help preserve its texture and shape, lay it flat to dry.
Final Thoughts
The Spider Stitch Blanket is a versatile project that can be adapted to suit any style or space. You can easily customize the size by adjusting the number of foundation chains and rows, and experimenting with different color combinations allows you to create a truly unique piece.
Whether it’s draped over a sofa, folded at the foot of a bed, gifted to a loved one, or wrapped around your shoulders on a chilly evening, this blanket offers both comfort and timeless beauty. The combination of simple stitches and stunning texture makes it a project you’ll want to crochet again and again.
Happy crocheting!